Posts

Showing posts from 2016

DIY Tinsel Christmas Tree New Lift

Image
We're moving all contents to a new site If you've come here through an old bookmark, please update accordingly. Looking forward to seeing you at the new  URL   😊   😘 Connect all the tinsels together to make a really long one This time I first wrap up the tripod with some red net fabric we saved from a gift hamper. This way the tinsel holds better in place when twirled around the frame. And the angel lights are placed first so that the wire is not visible over the tree. Start the long tinsel on the top with a knot then twirl it around the tripod until it's all covered up. Tie the end to one of the tripod legs to secure it.
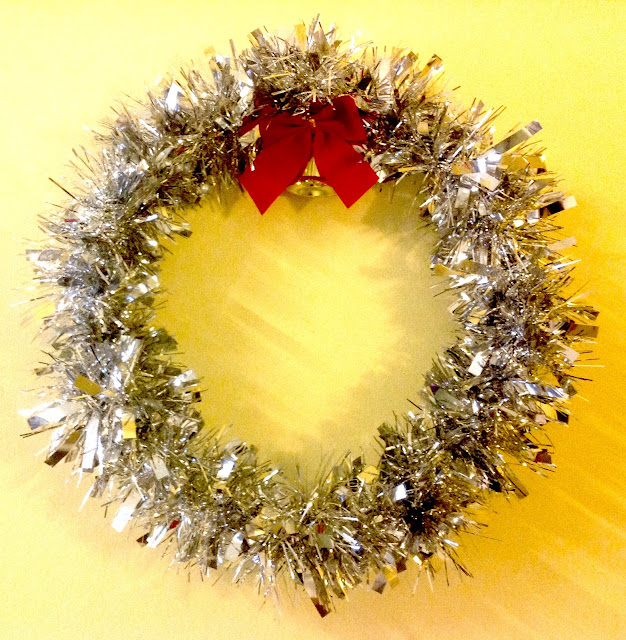
DIY Christmas Wreath Zero Cost

Image
We're moving all contents to a new site If you've come here through an old bookmark, please update accordingly. Looking forward to seeing you at the new  URL   😊   😘 Our old Christmas wreath made from old mince pie boxes has way passed its sell-by date, so it's time to have a new one made. This new one can't be easier; I found an old wire in the tool box (probably taken out from an old hanger) and bent it into a circle, with both ends twisted into small loop then tied with a bendable twist tie wire. I then twirled the silver tinsel (found in the box with old Christmas decoration) around the wire, secured by twisting the ends together. Finally slapped on a decorative bell and ribbon - again, from the Christmas decor box. Not a single penny was spent. Not even an inch of cello tape. Welcome to the first day of Advent!

Upcycled Wine Cork Trivet

Image
We're moving all contents to a new site If you've come here through an old bookmark, please update accordingly. Looking forward to seeing you at the new  URL   😊   😘 Just when I was about to give up and decide to clean them out, I caught a glimpse of a trivet made of wine corks in the background of a TV show. Obviously this is not an original idea and surely there must be others who've already done so, but hey I managed to use up all the corks and turned them into something useful - that's good enough for me. Most importantly: I get to keep them, not bin them ;)

What to do with damp stained shirt

Image
We're moving all contents to a new site If you've come here through an old bookmark, please update accordingly. Looking forward to seeing you at the new  URL   😊   😘 This cushion cover is made from one of my husband's old shirts, which unfortunately had been damp stained on the collar due to the highly humid weather. We can't give it away to the charity and the material is not suitable for cleaning. I was meant to upcycle it into a wrap dress but was too lazy to do so. Whilst I was staring into the buttons the idea just came to me. It was so simple: Just lay the shirt flat, buttoned, turned inside out. Mark out the square (whatever size fits your cushion) where the button panel will fall in the middle. Secure with pins or quick stitches, cut the excess material out and sew it all around. (I did it by hand as I don't have a sewing machine) Unbutton and turn inside out. Now you have a cushion cover with ready button fastening. We probably

Handmade Hand Fan

Image
We're moving all contents to a new site If you've come here through an old bookmark, please update accordingly. Looking forward to seeing you at the new  URL   😊   😘 4 good reasons that made me think of making my own hand fan: Extremely hot weather Some used disposable chopsticks and manky wooden spoons lying around Some odd old table mats I can't be bothered to spend money on an ugly ones available in the shops And the whole process can't get any simpler: Cut out 2 identical rectangles from the table mat Spread strong glue evenly on the underside of each cut out mat, leave to dry. Stick the 2 chopsticks together with strong glue.  When the chopsticks are dry and firmly in place, apply thick glue over about 2-3 inches of the smaller end (depends on the length). Now place the glued part onto the middle of one of the cut out mat's underside, then press on the other cut out mat, making sure that all sides are in line. Leave to dry.